Home Cold Plunge Buying Guide Built on Chiller Math
A home cold plunge buying framework: match chiller size to tub volume, master water care, estimate running cost, and plunge safely without a brand roundup.
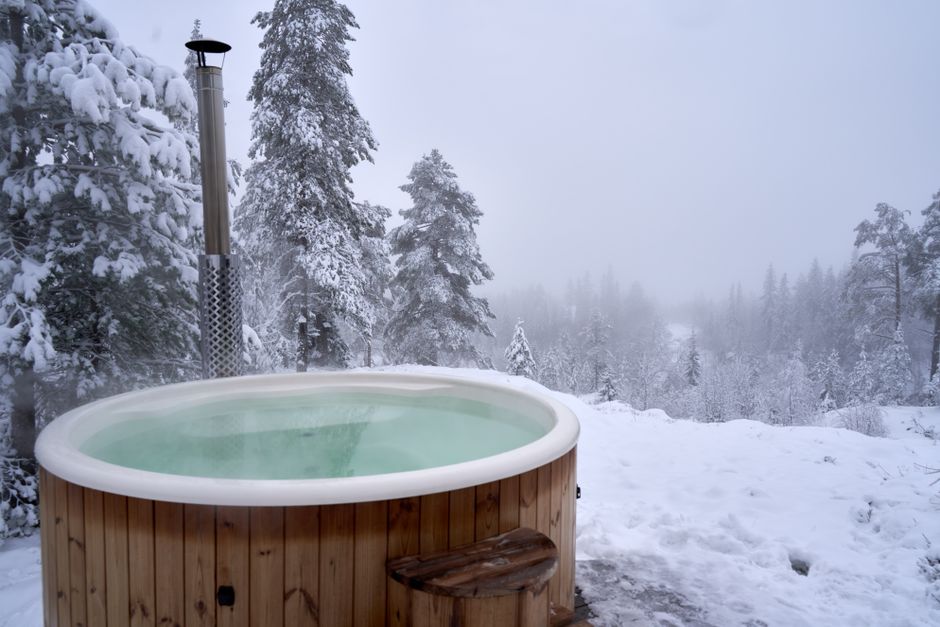
A home cold plunge rarely fails because you picked the wrong brand. It fails three specific ways: the chiller stalls at 8°C during the hottest week of July and never sees its 5°C setpoint, the water goes cloudy and then green by week three, and the electric bill runs well past what any product page implied. Those are engineering problems, and every one of them is decidable before you spend a dollar.
Stay in the loop.
Get the latest posts and exclusive content delivered to your inbox.
Join 11 readers. No spam. Unsubscribe in one click, anytime.
So treat this as a framework, not a ranking. Match chiller capacity to your water volume and your worst-case summer temperature, treat the lid as the highest-leverage upgrade you will buy, choose water care you can actually sustain, and gate every session on cardiac-aware safety checks. Get those four right and the format question, chest freezer conversion versus stock tank versus turnkey unit, mostly answers itself.
Why Brand Roundups Fail This Purchase
Affiliate listicles compare tubs on the dimensions that differ between products: shell material, seating, app features, jet count. They stay quiet about the dimensions that decide whether the plunge works in your yard. A $4,000 barrel with an undersized chiller, thin walls, and a soft cover will lose, through most of the summer, to a $600 chest freezer conversion with a sealed lid and a right-sized chiller. The correct ranking depends on your climate, your volume, and your maintenance tolerance, which is why no universal ranking can exist.
The purchase order most people run is backwards. They pick a tub first, then discover what it costs to hold cold. The order that works: volume and body fit, worst-case ambient temperature, sanitation plan, then format. Money follows engineering.
The Home Cold Plunge Decision Order
Four decisions come before any tub comparison.
1. Volume and body fit. Volume drives chiller size, chemical dosing, and refill cost, so fix it first. A seated adult displaces roughly 65 liters, which matters twice over: it is water pushed out of an overfilled tub on day one, and it is 65 liters of warm body mass the chiller now has to fight. Vertical tubs hold less water for full-body coverage, often 250 to 400 liters, while square seated tubs run 400 to 600 liters and cost more to hold at the same temperature.
2. Worst-case ambient temperature. Look up your hottest typical week, not your average summer day. Chiller capacity falls as air temperature rises, so the unit that holds 5°C in May can stall in August. Size for August.
3. Sanitation plan. Decide your sanitizer before you choose the tank, because the two interact. Chlorine and bromine are cheap, forgiving, and corrosive to galvanized steel. Peroxide-based systems are gentler on metal tubs and fussier about dosing.
4. Format. Only now compare conversions, stock tanks, and turnkey units, because you finally know what the winner has to do.
How to Size a Cold Plunge Chiller for Volume and Climate

"What size chiller for a cold plunge" has a computable first half and an estimated second half. The computable half is pull-down energy.
The worked example
Take a round-numbered tub: 300 liters filled from 20°C tap water, targeting 5°C. Water holds 4.186 kJ per kilogram per degree, so removing 15 degrees from 300 kg means moving about 18,800 kJ, call it 5.2 kWh of heat. A chiller moving roughly 0.5 kW of heat at your worst-case ambient needs about ten and a half hours for the initial pull-down. That is fine overnight, and it is why pull-down is rarely the real constraint. Holding temperature against continuous heat gain is.
Rules of thumb by climate
These are community-tested starting points, not guarantees. Derate further for full sun, no lid, or thin walls.
| Chiller tier | Mild summer, peaks near 30°C | Hot summer, peaks near 38°C |
|---|---|---|
| 1/4 HP | up to ~150 L | not advised |
| 1/3 HP | 150 to 250 L | up to ~150 L |
| 1/2 HP | 250 to 350 L | 150 to 250 L |
| 1 HP | 350 to 500 L | 250 to 400 L |
Why chillers stall a few degrees short
An air-cooled chiller rejects heat into the surrounding air through its condenser. The hotter that air gets, the smaller the temperature difference driving heat out of the refrigerant, and the less heat the same compressor moves. Air-cooled chiller derate data in the engineering literature documents this directly: capacity falls as ambient rises, and it falls steeply once you are well past the rating point. A unit that moves a true 0.5 kW at 25°C ambient can deliver materially less at 38°C, exactly when your tub's heat gain peaks. The result is the classic complaint, a chiller that runs all afternoon holding 8°C when you asked for 5°C, then catches up overnight. The unit is not broken, it is simply undersized for August.
Add one load most spec sheets ignore: the circulation pump dumps its motor heat into the water continuously, commonly somewhere between a few tens of watts and 150 W. That is trivial for a hot tub holding 38°C and genuinely material for a plunge holding 5°C, because every watt the pump adds is cooling you already paid for.
Insulation and Lid Discipline
An open water surface gains heat faster than any other path into a plunge. Evaporation carries a large latent heat load, and an uncovered surface also collects solar gain and convective heat all day. A well-sealed, insulated lid cuts chiller runtime more than any other single upgrade, often by a wide margin. If you can only spend money in one place, spend it on the lid.
Walls come second. Single-wall stock tanks benefit from wrapped insulation or a foam board box built around them. Placement is free: moving a tub out of full sun removes heat the chiller would otherwise fight all afternoon. In winter, an outdoor setup needs freeze protection for the pump, chiller, and plumbing, or a full drain-down, because ice expanding in the wrong fitting is an expensive repair.
Chest Freezer, Stock Tank, or Turnkey Unit

The stock tank vs chest freezer cold plunge question, plus the turnkey option, resolves cleanly once you know your volume, climate, and sanitizer plan.
| Chest freezer conversion | Stock tank | Turnkey unit | |
|---|---|---|---|
| Upfront cost | ~$150 used freezer plus $300 to $700 in parts | ~$100 to $250 plus chiller and plumbing | roughly $2,000 to $8,000 |
| Insulation | excellent, walls ship pre-insulated | poor, single wall | varies, usually decent |
| Filtration and sanitation | you build or add it | you build or add it | integrated |
| Upkeep effort | high, fully DIY | high, fully DIY | low to moderate |
| Warranty and certification | none on a converted appliance | tank only | real warranty, ask for listing |
| Corrosion risk | low, plastic interior | high with galvanized steel plus chlorine | low by design |
The conversion case: a used chest freezer for around $150, a $40 chest freezer cold plunge temperature controller wired to cycle the factory compressor, and a wet probe in the water. The compressor was built to hold -18°C, so holding +3°C is light duty, and the walls ship with foam already in place. That is why conversions reach the lowest cost per gallon to run of any format. The trade is ownership: filtration, sanitation, and plumbing are yours to add, and no appliance warranty covers a freezer full of water.
Stock tanks are the cheapest path to volume, but chlorine and bromine sanitizers accelerate corrosion of galvanized steel, so polymer tanks or peroxide-based water care pair better with metal. Turnkey units integrate everything and carry real warranties. The trap is chiller spec: some premium tubs ship with compressors the sizing table above would question. Ask what holds temperature in a 38°C week, and whether the equipment is certified to the NSF/ANSI 50 standard covering pool and spa equipment.
Water Care You Can Actually Keep Up
How to keep cold plunge water clean is a maintenance-design question, not a willpower question. Cold slows microbial growth, it does not stop it, and a plunge without sanitizer or filtration can develop biofilm and waterborne bacteria within weeks of regular use. Skin oils, sweat, and debris feed it every session.
Borrow public spa logic. The CDC's Model Aquatic Health Code, the template behind most US pool and spa rules, treats two things as non-negotiable: a measurable sanitizer residual and water turnover through filtration. A home plunge can copy that logic at domestic scale. The CDC's hot tub rash guidance points at the same failure mode, Pseudomonas bacteria taking hold when sanitizer residual slips.
Pick a sanitizer you will actually dose:
- Chlorine or bromine: cheap, forgiving, well understood. Do not pair with galvanized steel.
- Hydrogen peroxide plus UV: metal-friendly and gentle on skin, but peroxide degrades quickly and dosing discipline matters more.
For filtration, think in turnover: two to four full-volume passes per day. A 300 L tub at four passes wants about 50 liters per hour, comfortably within a small cartridge filter paired with your circulation pump.
The routine: a test strip weekly for sanitizer residual and pH, dose as needed, skimmer pass while you are there. Drain and refill every four to eight weeks depending on use. Cloudy water means filtration or residual has slipped. Slippery walls mean biofilm has colonized, and that is a drain, scrub, and refill event, not a shock-and-hope event. If the routine takes more than about a minute, you will stop doing it by August, which is exactly how green water happens.
Running Cost and Electrical Reality
Cold plunge electricity cost per month tracks duty cycle far more than compressor nameplate. The compressor only draws power while running, and how much it runs is mostly decided by your lid and insulation, not by which chiller you bought.
Illustrative math you can redo with your own rate: a chiller drawing about 900 W when running, averaging 25% duty cycle with lid discipline, runs six hours a day. That is roughly 5.4 kWh daily, about 160 kWh monthly, or $25 to $50 at $0.15 to $0.30 per kWh. The same unit with no lid in full summer sun can see its duty cycle double, and the bill with it. This is the same duty-cycle reasoning behind our home sauna running cost breakdown: nameplate sets the ceiling, insulation decides where in the range you live.
Electrical rules are short: outdoor receptacles require GFCI protection under NEC 210.8, use listed equipment, and never run a chiller on a casual household extension cord. Water plus electricity plus bare feet is the failure mode that ends badly.
Safety Gates Before You Get In
Cold plunge contraindications come before technique. A systematic review of cardiovascular responses to cold water immersion documents the acute circulatory strain involved, and people with known or suspected cardiovascular disease face elevated arrhythmia risk during immersion. Clinician screening is a hard gate, not one input to weigh against benefits.
Then the session itself, in sequence:
- Cold shock, the first minute.Cold shock research shows the response peaks in the first 60 to 90 seconds, driving an involuntary gasp and hyperventilation. Enter gradually, keep your head above water until breathing is under control, and never plunge alone.
- Session discipline. Two to five minutes at 5°C covers most protocols. Hard shivering, numb fingers, or losing coordination means out now, timer be damned.
- Afterdrop, after you exit. Cold blood returning from the limbs means core temperature can keep falling for minutes after you get out; early afterdrop measurements quantify the effect directly. Rewarm gradually with layers, movement, and a warm drink rather than an immediate hot shower. The CDC hypothermia guidance covers the warning signs worth knowing before you need them.
No alcohol before or during a session.
Your First 30 Days With a New Plunge
A commissioning sequence that closes every loop opened at the top:
- First fill. Sanitize the tub itself, fill, dose sanitizer, run filtration for several hours, and confirm chemistry with a test strip before anyone gets in.
- Step the temperature down. Start at 10 to 12°C for the first sessions, then drop toward your target over one to two weeks. Cold shock tolerance is trainable, and the curve is steep.
- Baseline sessions. Log water temperature, session length, and subjective response for two weeks so you can tell adaptation from drift.
- Audit duty cycle in week three or four. If the chiller runs near-continuously through hot afternoons, the upgrade path is lid and insulation first, shading second, a bigger chiller last. The math above tells you which one pays.
Size the chiller to August, seal the surface, keep the water testable in one minute a week, know your kWh rate, and gate every entry. Do that, and almost any tub you can afford becomes a working home cold plunge, and most of the expensive ones become unnecessary.
Stay in the loop.
Get the latest posts and exclusive content delivered to your inbox.
Join 11 readers. No spam. Unsubscribe in one click, anytime.
About the author
Marcus Bao
Strength and Conditioning Coach
Marcus has programmed training for everyone from desk-bound beginners to masters athletes, treating every workout as an experiment with a measurable result. He writes ready-to-run strength, hypertrophy, and Zone 2 programs built around progression you can track.
Related Posts

Home Sauna Running Cost per Session vs the Gym Lounge
Home sauna running cost, cold plunge electricity, and water care priced per session, with break-even math showing when a home setup beats the gym lounge.
Which Luxury Gym Recovery Amenities Actually Work
Luxury gym recovery amenities like IV drips and saunas promise faster recovery. Discover which ones actually work and how to replicate them at home.
Cold Plunge Protocol Dosing, Timing, and Recovery Trade-offs
A cold plunge protocol covering temperature, duration, timing, and the recovery-versus-adaptation trade-off you need to know before you get in the tub.